


Heroku is a Platform as a Service (PaaS) that allows developers to deploy, manage and scale their applications in the cloud and supports programming languages like PHP, Java, Nodejs, Scala, Go, Scala and Clojure. Fasten your seatbelts while I show you how you can deploy your PHP and MySQL projects to Heroku and manage subsequent deployments.
NB: This article assumes you already have a working PHP with MySQL project on your local directory with Git CLI set up. If you haven't set up Git CLI, kindly follow the guide here to set it up. Also, to verify if you've installed git, you can run this command; git --version.

There are three (3) methods of deploying your application to Heroku, as seen in the screenshot above; using Heroku Git, using GitHub (connecting Heroku to the git repo of the application), and using Container Registry. For now, we'll be focusing on using Heroku Git.
Let's get started.
- Firstly, we need to create an account on Heroku and install Heroku CLI. Kindly check out this link for installation procedures specific to your OS.
NB: Linux users can use the following alternative to install Heroku CLI. Open your terminal and run these commands; $ sudo apt-get update; $ sudo wget -O- https://toolbelt.heroku.com/install-ubuntu.sh | sh and $ heroku update (without the $ as this only signifies you're currently in your terminal). Also, you can verify your installation by running the command $ heroku --version.
- Run the command
$ heroku loginto login to your Heroku account from your terminal then follow the prompt to authenticate with your login credentials. You should see something like the screenshot below if you were logged in successfully.

Go ahead and create a repository for your project on GitHub and copy the link to the repo. Open your project directory in your terminal and initialize a git repository if you haven't. You can achieve that with the following commands;
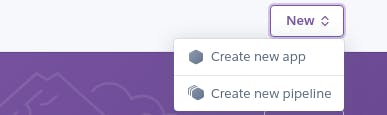
$ git initthen stage all files for commit with$ git add .; provide your commit message with$ git commit -m "your commit message"then$ git remote add origin https://github.com/test/projectlink.git(replace with the link to your project's git repository which you just copied) then run$ git push origin mainto push your files to the main branch.Moving on, navigate to your Heroku dashboard and click Create new app.
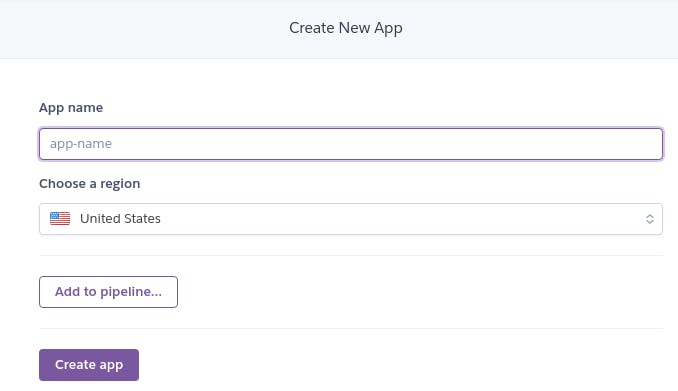
Choose an available app name, choose a region from the options, and click Create app.
Every app on Heroku has its git repo but this time, hosted on Heroku and that's where you push your application files for deployment. Having said that, your git CLI needs to know the URL of the repo hosted on Heroku.
Running the command
$ heroku git:remote -a test-appafter you must have logged in, sets the repo to the Heroku hosted repository. (Replace test-app with your app's name ie. the name you used while creating a new app on Heroku).Then run
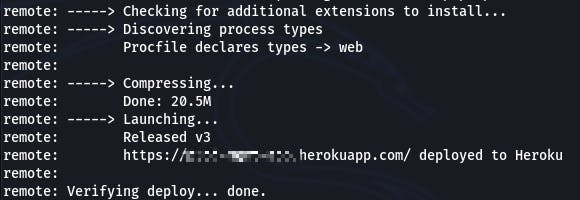
$ git push heroku mainto push your files to Heroku git. When the process is done, Heroku will generate a URL to your application as shown in the snapshot below;
And that's it! Your app has been deployed successfully. Let's move on to setting up the database.
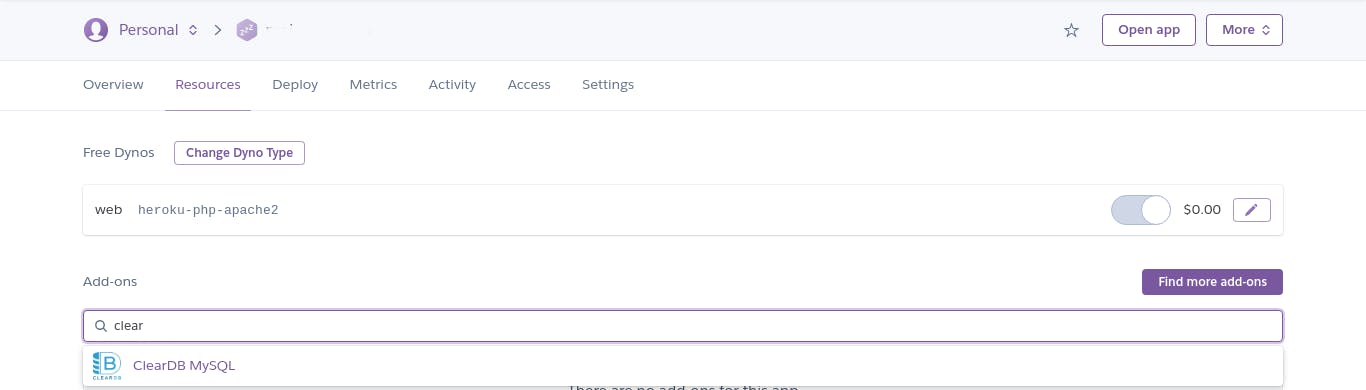
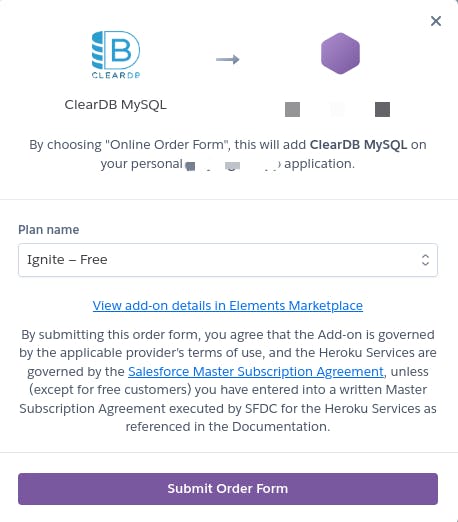
- Navigate to your Heroku dashboard, select Resources, and search for ClearDB MySQL in the search box. (see the snapshot below)
- Select the Free option and Submit the order form. You'll be required to add your credit card in this step because you need to verify your account on Heroku to be able to use add-ons. Don't worry you won't be charged provided that you select the free option. You should be able to submit the order form once you've completed this step.
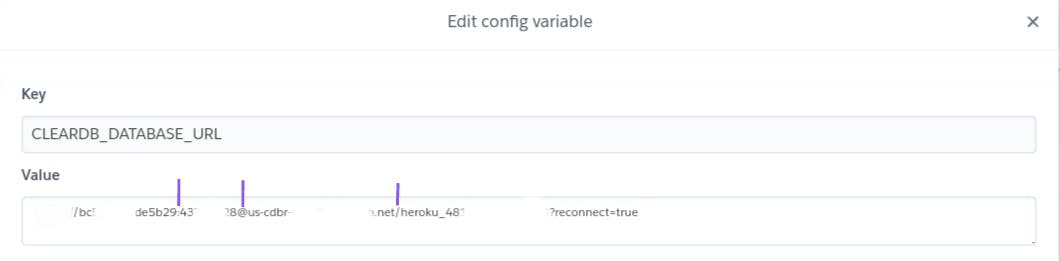
- Now, to get your database credentials, navigate to Settings (same tab you selected Resources from) and scroll down to Config Vars.

- Click Reveal Config Vars then copy your database credentials into your text editor. The URL contains everything you need to connect to your ClearDB MySQL database remotely via phpMyAdmin.

The first string of characters before the ":" is your username followed by the password which ends before the "@" symbol, then the last part of the URL, just before the "/" represents your database host.
To set up phpMyAdmin, open your Xampp's installation directory and locate the file config.inc.php (for Windows users, it's usually located at
C:\xampp\phpmyadmin\config.inc.phpand/opt/lampp/phpmyadmin/config.inc.phpfor Linux users.)Open the file with any text editor and append the code below to the file. Replace the host, username and password with the credentials you copied to a text editor above and save.
//Heroku Configurations
$i++;
$cfg['Servers'][$i]['host'] = 'yourhost.cleardb.net';
$cfg['Servers'][$i]['user'] = 'username';
$cfg['Servers'][$i]['password'] = 'password';
$cfg['Servers'][$i]['auth_type'] = 'config';
Navigate to your phpMyAdmin dashboard (
localhost/phpmyadmin) and select the database server you just added from the left pane.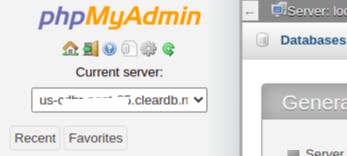
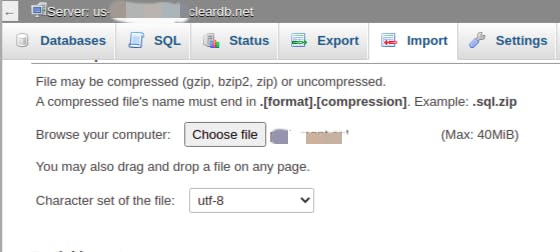
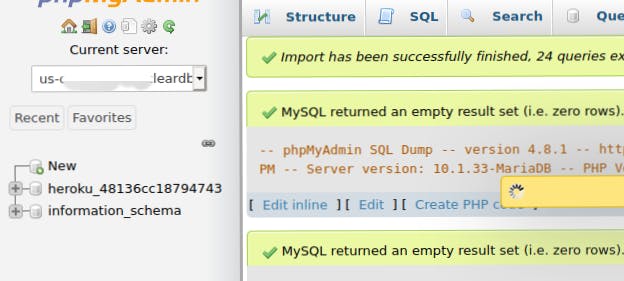
Import your database.
Now, copy and paste the code below to the DB connection file of your app to update your new database credentials. Replace CLEARDB_DATABASE_URL with the URL to your database gotten earlier when you clicked Reveal Config Vars, then save.
$cleardb_url = parse_url("CLEARDB_DATABASE_URL"); $cleardb_host = $cleardb_url["host"]; $cleardb_username = $cleardb_url["user"]; $cleardb_password = $cleardb_url["pass"]; $cleardb_database = substr($cleardb_url["path"],1); $dsn = "mysql:host=" . "$cleardb_host" . ";dbname=" . $cleardb_database; $conn = new PDO($dsn, $cleardb_username, $cleardb_password);- Then run
git push heroku mainto push the changes you just made. Also, for each subsequent change you make to your project, run the following commandsgit add .;git commit -m "commit message"thengit push heroku mainto push and deploy the changes to Heroku.
That's it. You're good to go!
Have any questions or suggestions, feel free to reach out to me on Twitter. Ciao🥂